TL-MR3020 Hacking
I - What’s the TL-MR3020?
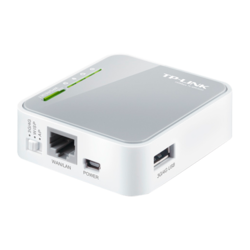
- The TL-MR3020 is a small, portable wireless router made by TP-Link. Originally designed to share a 3G/4G USB modem connection over Wi-Fi, but we want more right ?
- It’s based on the Atheros AR9331 SoC, which includes:
- A 400 MHz MIPS processor
- 4 MB flash, 32 MB RAM
- USB 2.0 host support Despite its limited specs, the TL-MR3020 is incredibly capable with the right tweaks — and that’s what this post is all about.
II - What’s openWrt:
OpenWrt is a lightweight Linux distribution designed specifically for embedded devices like routers. Unlike the stock firmware that comes preinstalled on most routers, OpenWrt gives you full control over your device — with a package manager, writable filesystem, and the ability to run your own software.
III - Why Hack This Router?
First and foremost — why not? But on a serious note, hacking the TL-MR3020 breathes new life into an old piece of hardware and unlocks its full potential.
Once you’ve got OpenWrt running and serial access set up, you’re no longer limited by the stock firmware. On the contrary, you’ll be encouraged to innovate and experiment with your own ideas, services, and projects.

IV - Building a Custom OpenWrt Image
As mentioned earlier, OpenWrt is a Linux distribution tailored for embedded devices. The latest supported version for the TL-MR3020 v1 is 17.01.7 (check hardware support).
By default, the official OpenWrt image comes with LuCI, the web interface — but it consumes a significant amount of the router’s already limited memory.
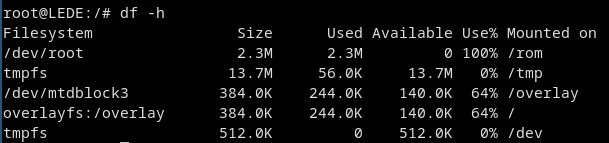
<|> TL-MR3020 With the official openWrt image:
Out of the box, the router has only ~140 KB of free space left — not enough to install the packages needed for EXT4 or USB storage support.
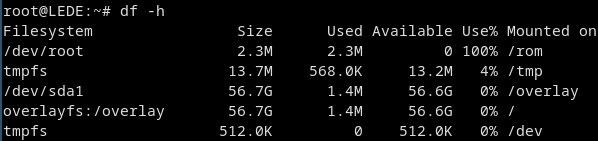
<|> TL-MR3020 With our Custom Image:
With a custom OpenWrt image, we can mount an external flash drive (e.g., a 64 GB USB) and use it as the main storage for packages and configuration files. This unlocks a ton of possibilities.
<|> Download The image Builder:
openWrt provide an image builder for you to make a custom image with your specific needs in mind (Download)
<|> Build the image:
Install any necessary dependencies on your system, then run:
make image PROFILE=tl-mr3020-v1 PACKAGES="kmod-usb-core kmod-usb2 kmod-usb-storage kmod-fs-ext4 block-mount kmod-usb-storage-extras libblkid libuuid"
Once the build finishes, the output will be located under:
bin/targets/ar71xx/generic
V - Flashing the OpenWrt Firmware
<|> First-Time Flash:
If this is your first time installing OpenWrt on the TL-MR3020, follow these steps:
-
Download the correct firmware
Use the factory image:
lede-17.01.7-ar71xx-generic-tl-mr3020-v1-squashfs-factory.bin -
Connect to the router
Power on the router and connect to its default Wi-Fi network.
On the back of the router, you’ll find details such as:- Default SSID
- Default IP (usually
192.168.0.1or192.168.1.1) - Default username/password
-
Access the web interface
Open a browser and go to the default IP address.
Login using the default credentials (oftenadmin/adminor blank password). -
Flash the firmware
Navigate to:
System Tools > Firmware Upgrade
Upload the.binfile you downloaded earlier. -
Wait for the router to flash and reboot
Once the process finishes, the router will reboot into OpenWrt. -
Next Step: Connect via SSH
After flashing, you’ll want to connect to your router via SSH.
→ See the Connecting to the Router via SSH section.
<|> Updating to a New Version:
If OpenWrt is already installed on your TL-MR3020:
-
Download the sysupgrade image
Get this file:
lede-17.01.7-ar71xx-generic-tl-mr3020-v1-squashfs-sysupgrade.bin -
Connect to the router
See How to Connect to the Router. -
Host the firmware on your PC
Inside the output folder on your host machine:python3 -m http.server 8000 -
Download the firmware to the router On the router (via SSH), run:
wget http://<PC_IP>:8000/lede-17.01.7-ar71xx-generic-tl-mr3020-v1-squashfs-sysupgrade.bin -O /tmp/sysupgrade.bin(don’t forget to change <PC_IP> to your host computer IP)
-
Verify the Download Check that the file size on the router matches the file on your PC.
-
Run The Upgrade
sysupgrade -n /tmp/sysupgrade.bin
VI - Connecting to the Router via SSH
- Connect your router to your computer using an Ethernet cable.
- SSH into the router using:
ssh -oHostKeyAlgorithms=+ssh-rsa -oPubkeyAcceptedKeyTypes=+ssh-rsa root@192.168.1.1- The router is usually configured to use 192.168.1.1 as its LAN interface IP.
- We force the use of RSA because the firmware is old and newer SSH clients may disable RSA by default.
- Voila! You’re in. You can now set an admin password or configure the system however you like.
/// By now you may think you have everything you need to start all the awesome ideas you have in mind… But:
So, let’s make that USB drive work for us!
VII - Preparing a USB Drive
-
Connect your USB drive to your computer.
-
Important: Before formatting, identify the correct device name for your USB drive to avoid data loss. Run:
lsblk- Look for your USB drive’s size and device path (e.g., /dev/sda1).
-
Format the USB drive to use the EXT4 filesystem with:
sudo mkfs.ext4 -O ^has_journal -m 0 -L <LABEL_NAME> /dev/sdX1- Replace /dev/sdX1 with the actual device name of your USB partition.
-
Explanation of options:
- -O ^has_journal: disables journaling to reduce write wear and improve speed (less resilience to crashes).
- -m 0: reserves 0% space for root (normally 5% is reserved on Linux root disks, but not needed here).
- -L <LABEL_NAME>: sets a label name for the partition (replace <LABEL_NAME> with your desired label).
VIII - Mounting the USB Drive on the Router
- Plug the USB drive into the router.
- check if the device is recognized:
You should see something like /dev/sda1.
ls /dev/sda* - Create a mount point:
mkdir /mnt/usb - Mount the USB drive:
mount /dev/sda1 /mnt/usb - Navigate to the mounted directory:
cd /mnt/usb - Voila! You can now read from and write to your USB drive.
IX - Making the USB the New Overlay (Storage Expansion via OverlayFS)
By default, the router has only a few kilobytes of writable space. Let’s fix that by using a USB drive as the new overlay storage.
- Edit the fstab configuration:
- Open the file /etc/config/fstab and add the following:
config mount option target '/overlay' option uuid 'XXXXXXXXXX' # use block info to get your usb uuid option fstype 'ext4' option options 'noatime,nodiratime,data=writeback,barrier=0,commit=60' option enabled '1' option enabled_fsck '1'- Get your USB’s UUID by running:
block info - Copy the current overlay to the USB:
mount /dev/sda1 /mnt mount_root cd /overlay tar -cf - . | tar -C /mnt -xvf - umount /mnt- This command tars the current overlay contents and extracts them onto the USB drive. ✅ After reboot, OpenWrt will mount the USB as your overlay partition — giving you way more room for packages and configuration!
If something doesn’t work, try using:
dmesgthis shows the kernel debug messages – useful for debugging USB or mount issues.
(Optional) Adding Swap Space
⚠️ Backup your files — you may lose data if something goes wrong.
You can add swap space to improve memory usage. Here’s how:
- Create a new partition on your flash drive (e.g. 128MB) and set it as a Linux swap partition.
- Then, edit
/etc/config/fstaband add the following section:config swap option device '/dev/sda2' option enabled '1' - Reboot the router. Now you have 128MB of swap — more than enough for most tasks!
X - Setting Up the Serial Interface

Setting up a serial interface gives you direct access to the router’s boot messages and console — even if the firmware isn’t working correctly.
<|> Why Use Serial?
- Unbrick your router if something goes wrong during a firmware flash.
- Debug kernel boot logs and system errors.
- Access the system when SSH or LuCI isn’t available.
<|> Identifying the Serial Pins
On the TL-MR3020 v1 board, you’ll spot a row of unpopulated holes near the edge — that’s your UART/serial interface:
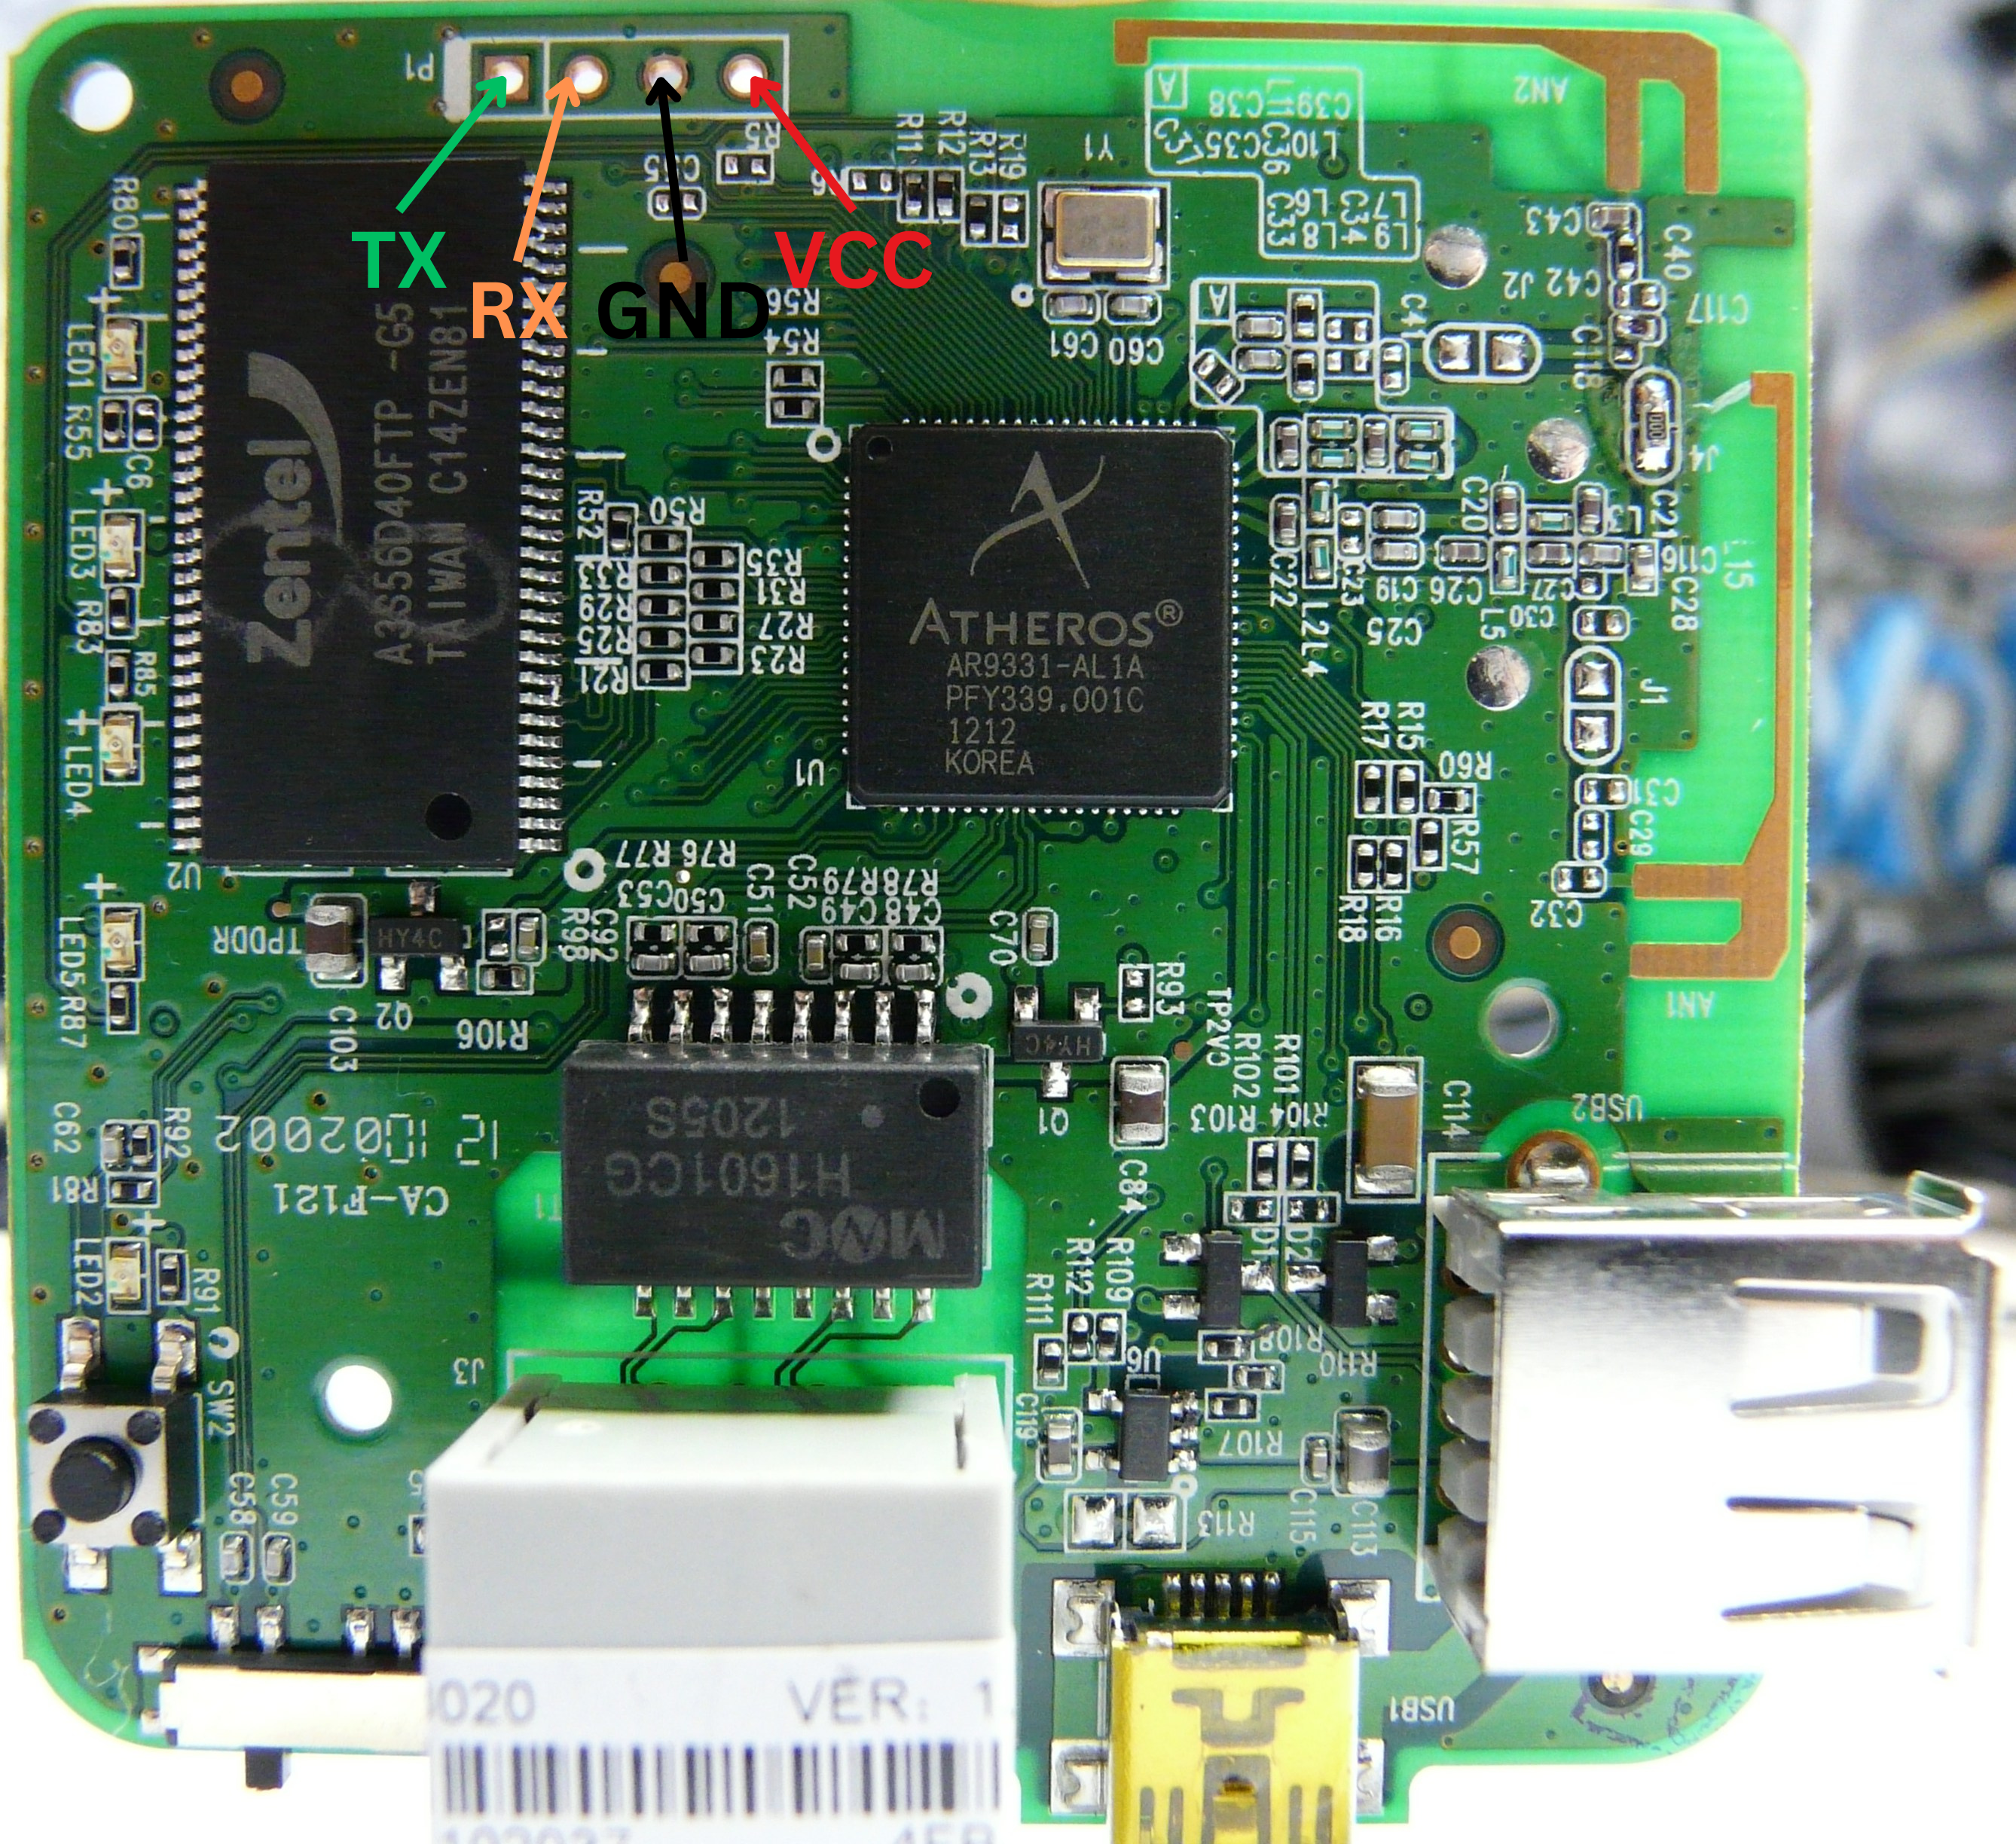
| Label | Purpose |
|---|---|
| VCC | 3.3V (⚠️ Do NOT connect to USB-TTL VCC) |
| TX | Transmit |
| RX | Receive |
| GND | Ground |
⚠️ Important: Only connect TX, RX, and GND. Do not connect VCC.
💡 Tip: You can solder some male header pins in there to make future connections easier — or just use jumper cables if you’re careful.
<|> Connecting the Router to a USB-to-TTL Adapter
- If you don’t have an adapter, check the I Have No Adapter section.
- Connect the adapter to your PC.
- Wire the adapter to the TL-MR3020 board as follows:
| USB-TTL Adapter | TL-MR3020 Board |
|---|---|
| TX | RX |
| RX | TX |
| GND | GND |
🔄 TX goes to RX and RX goes to TX.
<|> Using a Terminal Program
You can use minicom, picocom, or screen to open a serial connection.
Example with screen:
screen /dev/ttyUSB0 115200
💡I Have No Adapter
If you don’t have a USB-to-Serial adapter — no worries! Just make one with what you already have.
For me, I had:
- An Arduino Uno
- A Raspberry Pi Debug Probe
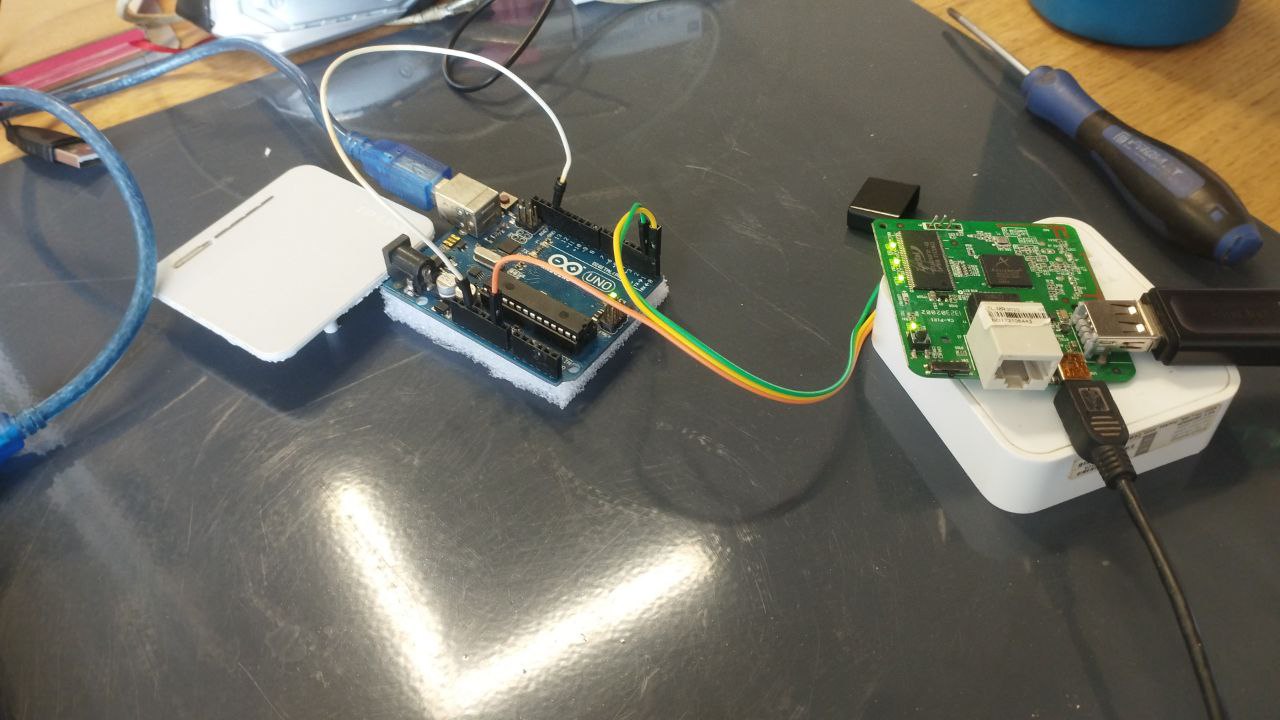
<|> Method 1: Arduino Uno (or similar)
Use the onboard USB-to-Serial chip of your Arduino.
Steps:
-
Connect Arduino via USB to PC
-
Wire like this:
Arduino Pin TL-MR3020 GND GND TX (D1) RX RX (D0) TX -
Connect RESET to GND on the Arduino.
Connecting RESET to GND keeps the Arduino in a permanent reset state, which effectively disables the ATmega chip and allows the USB-to-Serial converter (like the CH340 or ATmega16U2) to communicate directly with the TL-MR3020.
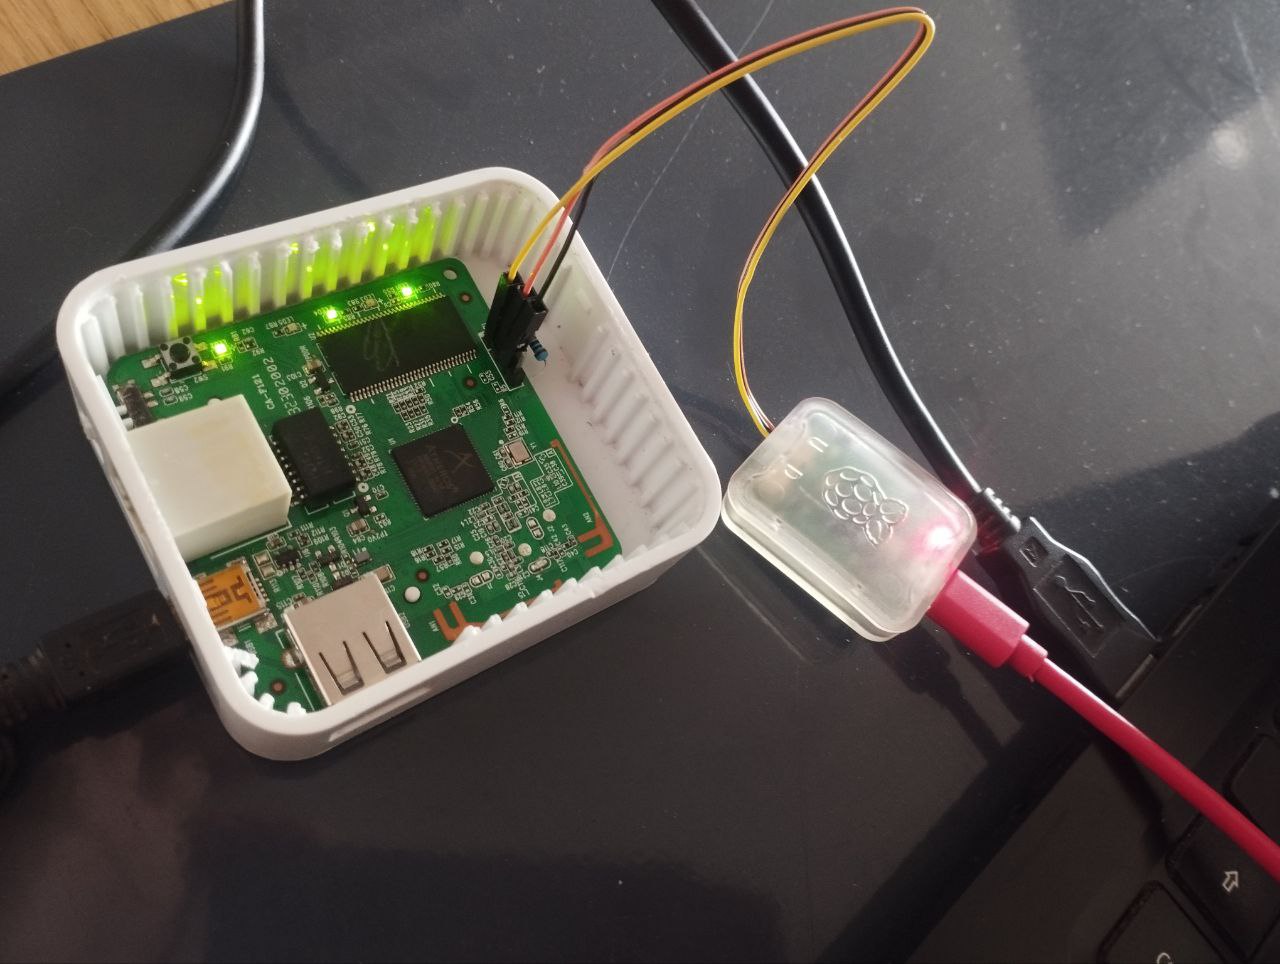
<|> Method 2: Using the Raspberry Pi Debug Probe
If you have the Pi Debug Probe, just use its UART port.
- Wire like this:
debug Prob TL-MR3020 GND GND TX RX RX TX
⚠️ Make sure your connections use 3.3V logic! The TL-MR3020 is not 5V-tolerant.
✅ Bonus: The Debug Probe gives great signal stability and has built-in protection.
Next Steps: Fun Projects You Can Do
1. Local Chat Server
- Host an IRC server (ngIRCd) on your TL-MR3020 and let friends connect using irssi or weechat.
- Great for:
- LAN parties
- Retro-feeling comms
- secure chat without needing internet
- And yep, all running off a tiny router with no internet required.

2. Host a Website (or Dashboard)
- spin up a tiny local web server using lighttpd or uhttpd
- host a personal dashboard, files, notes, or even a retro homepage
- make your own “internet-in-a-box” for offline use
3. Network Toolbox
- turn your TL-MR3020 into a Swiss Army knife for networking
- install tools like tcpdump, nmap, or iperf3
- use it to:
- scan and monitor local networks
- test speeds and latency between devices
- debug network issues from anywhere, even without your laptop (you can just ssh from your phone 😉
4. Just Go Wild
- You can literally do whatever you want :)
- It’s a Linux box — automate stuff, make it blink LEDs, build a weather station, hack together weird networking tools, or just make it do cool nerdy stuff.
- Your tiny router, your rules.